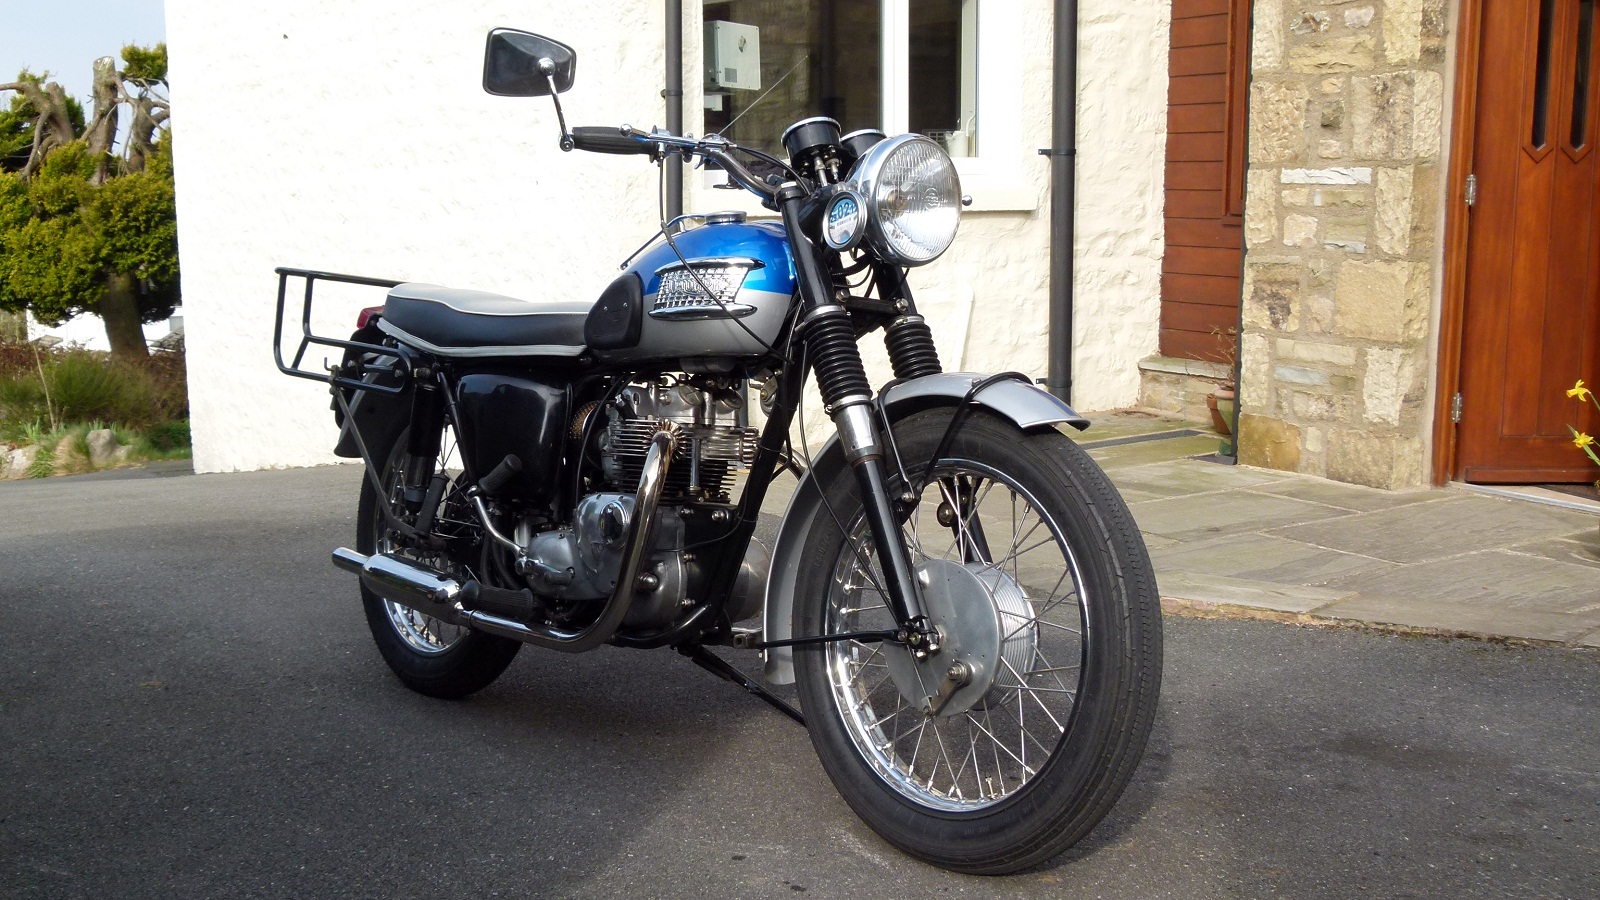
Life with a Triumph T90
2010 - The Latest Iteration
In 2004/2005 we embarked on a house restoration. Unfortunately the bike got buried below builder's bits in the garage and the builders frequently forgot to shut the garage door. Consequently, the bike got in a bit of a state - as I was doing a lot of the work myself, I didn't have much time to look at it.
After restoring the Bantam, I decided that I couldn't ignore the Triumph (also riding the Bantam reminded me why I'd got a Triumph in the first place!). It had to be brought up to the same standard. However there were 3 main long standing issues that I wanted to resolve.
- The first item was the flat bottomed, non original petrol tank that I'd had to fit in 1975. I'd managed to find a petrol tank with the recesses for the coils at the Classic Bike show in Stafford some years ago. The downside was that it had been used by Hamrax (since expired) to make up the styling strips on the side of the tank. At the end of a long day, they had taken out their frustration by using the tank as a drum kit. Consequently, it had a set of dents in it and it sat in a cupboard in the garage for a very long time. The tank was sent off to Lewis Templeton in Coventry where it disappeared for a while. In Summer 2010 I was pleasantly surprised to get a call from Allan Lewis telling me my tank was ready. This was the cue to pull the bike to bits.
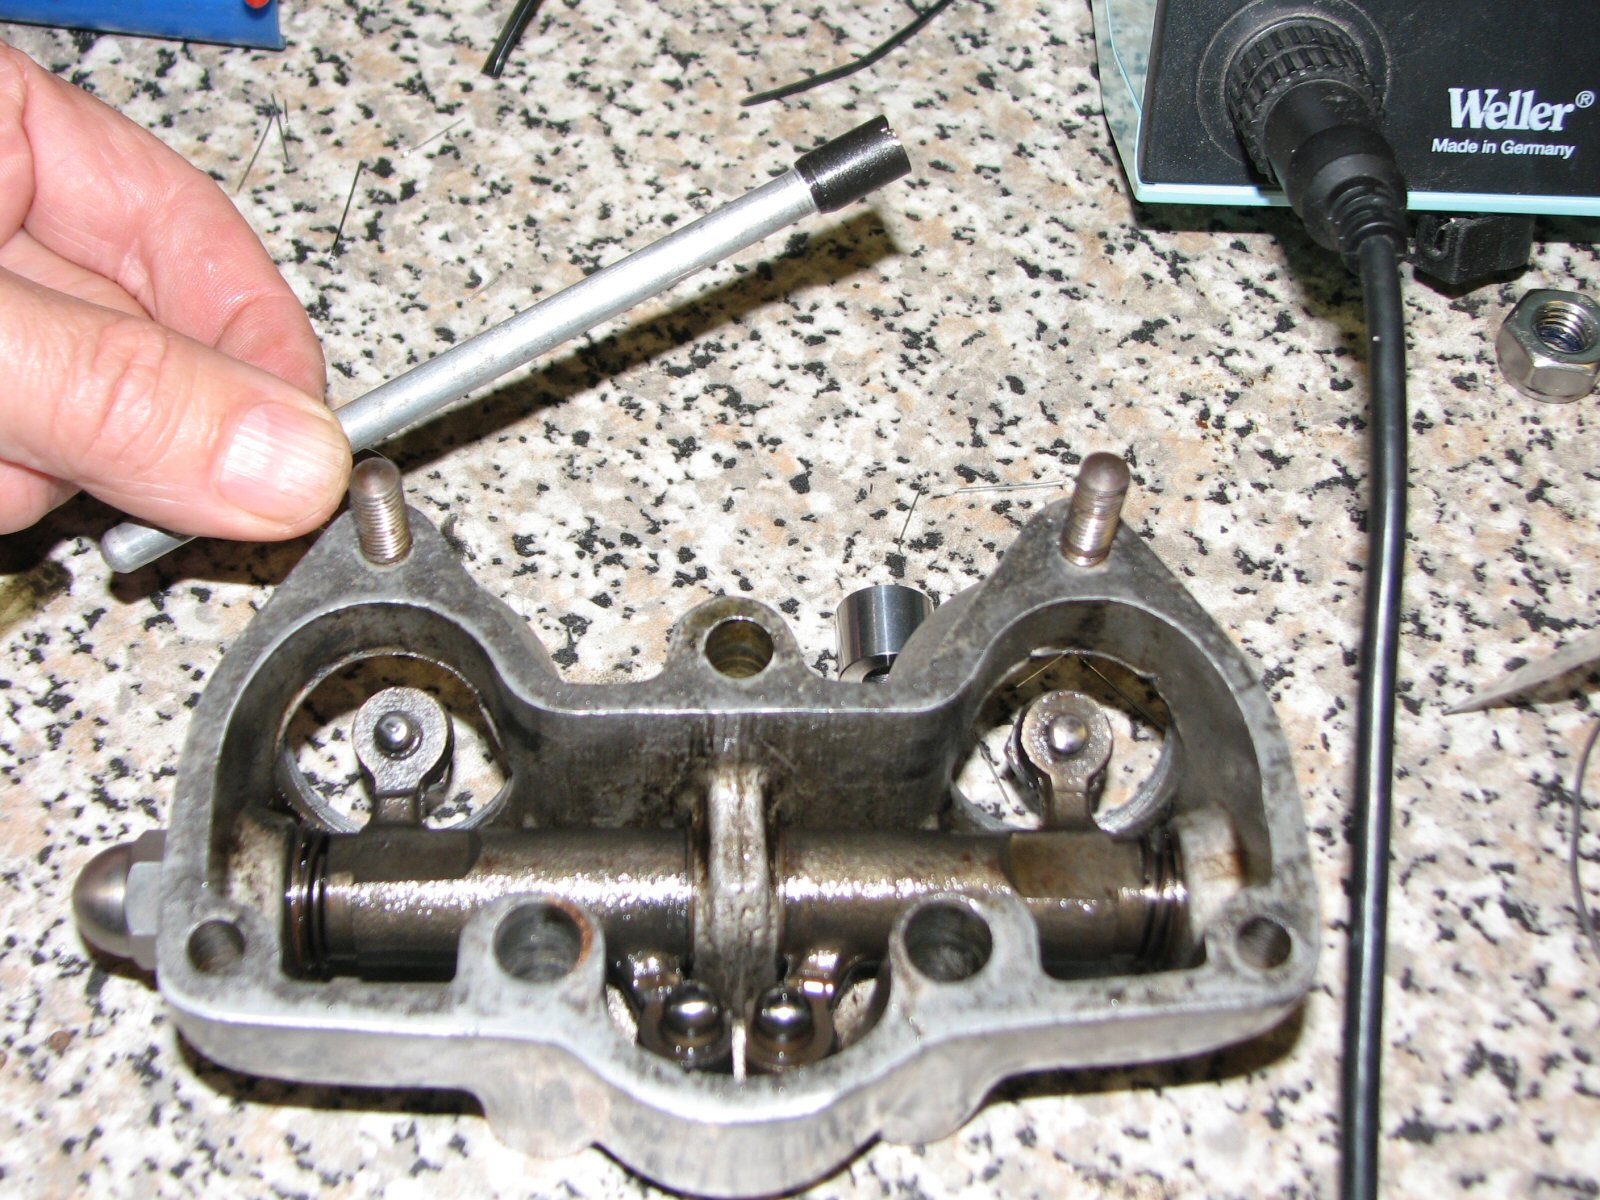
- Another item was the cylinder head. The bike didn't seem to run as well as it did with the original head. In particular, there was a marked power pickup at around 2000 revs. Below that, it seemed to struggle for breath. Somewhat surprisingly, the original crankcase and cylinder head had remained attached to me in my travels and had been adopted by a spider population in the loft. I didn't think about the head, until I spotted an advert by SRM Engineering where they said that they could repair cracked cylinder head fins. Now with SRM you get the gold plated job but it does make a big hole in your wallet! The fin repair is almost perfect (there is a tiny dimple on the line where the repair is) but the repair is remarkable as you can hardly see anything on the underside of the fin! See the photo below.
- The final key item was the crankcase. The one on the bike wasn't the original; the original had an ugly weld repair. Running a bike on unmatched engine frame numbers seems to be frowned on these days. Also I could never get the back left hand barrel/crankcase join to be oil tight. I think the crankcase metal has been pulled up by the stud. When restoring the Bantam I had used D & C Classic Motor Cycles in Cowling near Keighley to push out the swinging arm pin. While wandering around their workshop I had noted a lot of Triumph crankcases that had some good welding work on them. Dave at D & C agreed to have a go at my original crankcases. The crankcase had been repaired when it fell out of the vice in 1976 but the weld was ugly and I could never get the chaincase oil tight. D & C cleaned up the weld and improved the chaincase cover mating face. All screw holes were rethreaded.
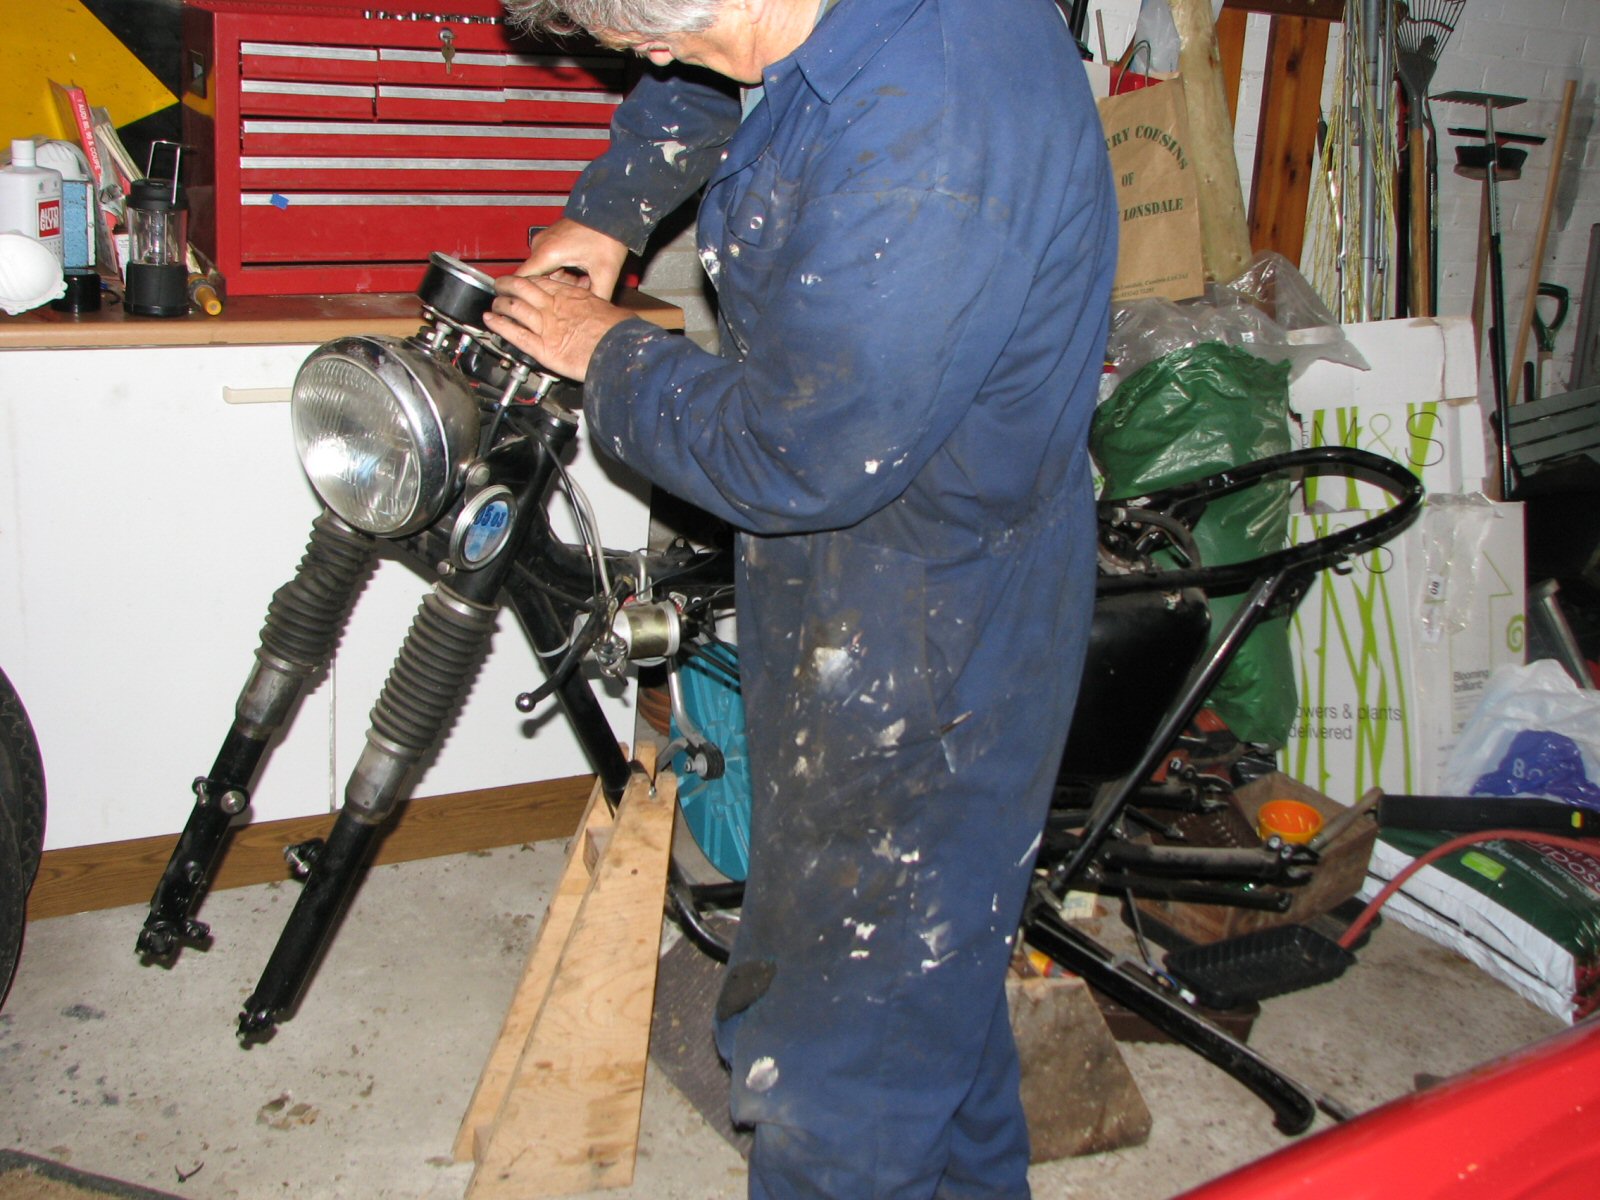 |
Pulling the Triumph to bits on a wet day. You can see that the last time it ran was in 2003. It's been the subject of the curse of the SORN since! Home made jigs help to keep it upright. |
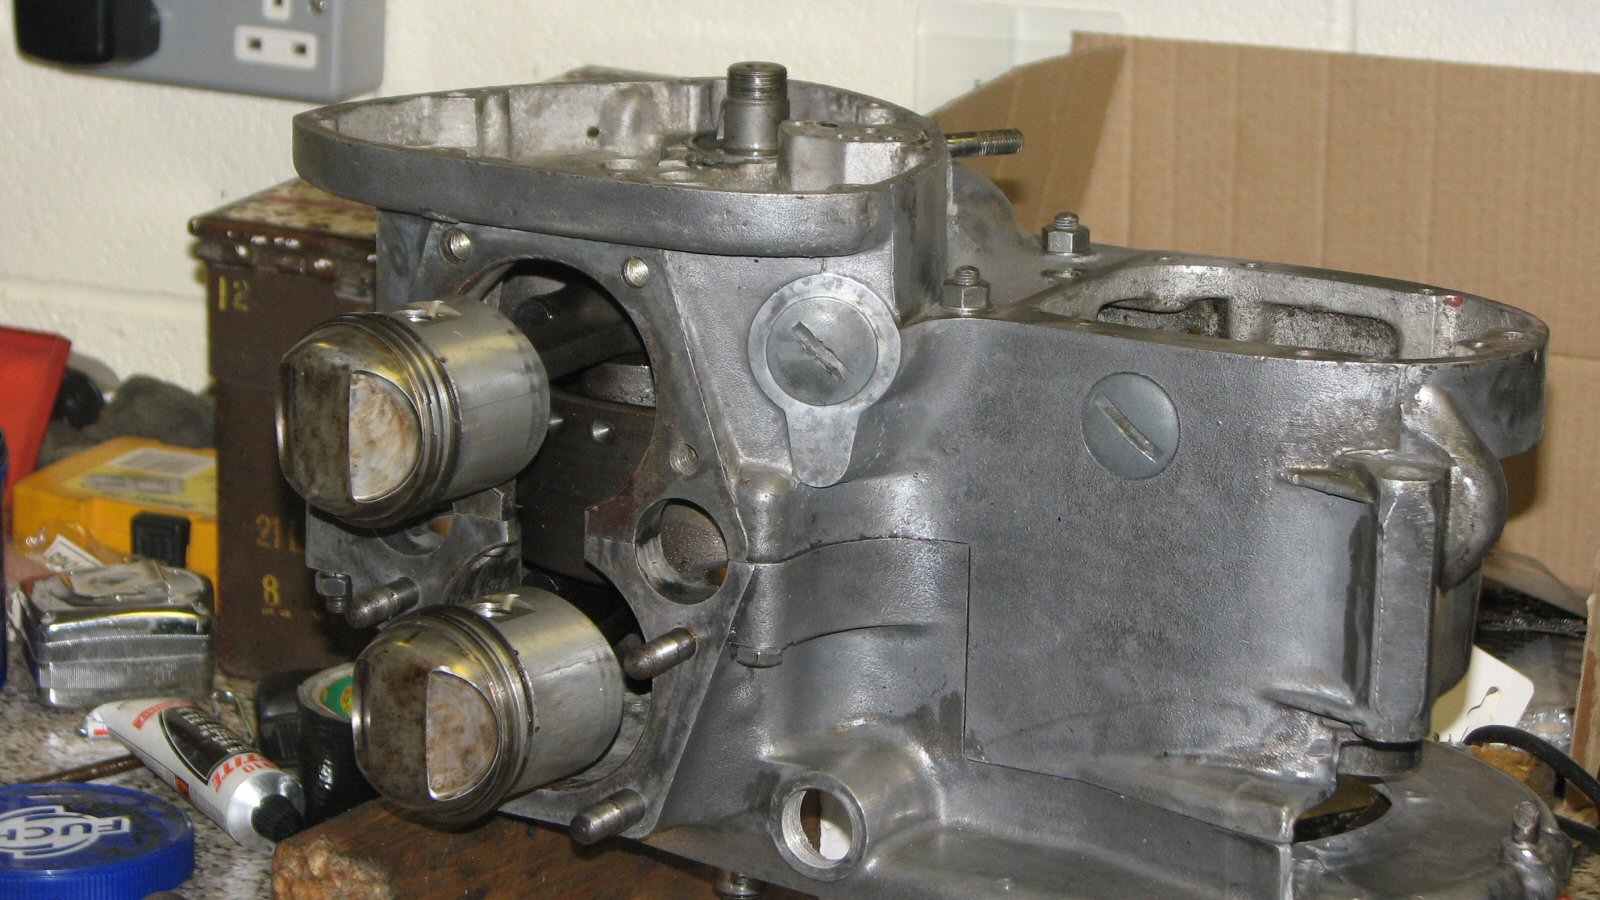 |
The original engine being rebuilt. After 30 years in various attics it didn't look very pretty but has responded to some TLC. It looked absolutely disgusting about 2 hours before the photo was taken. I persisted with a small polishing mop on a Dremel drill and was pleasantly surprised by the outcome. |
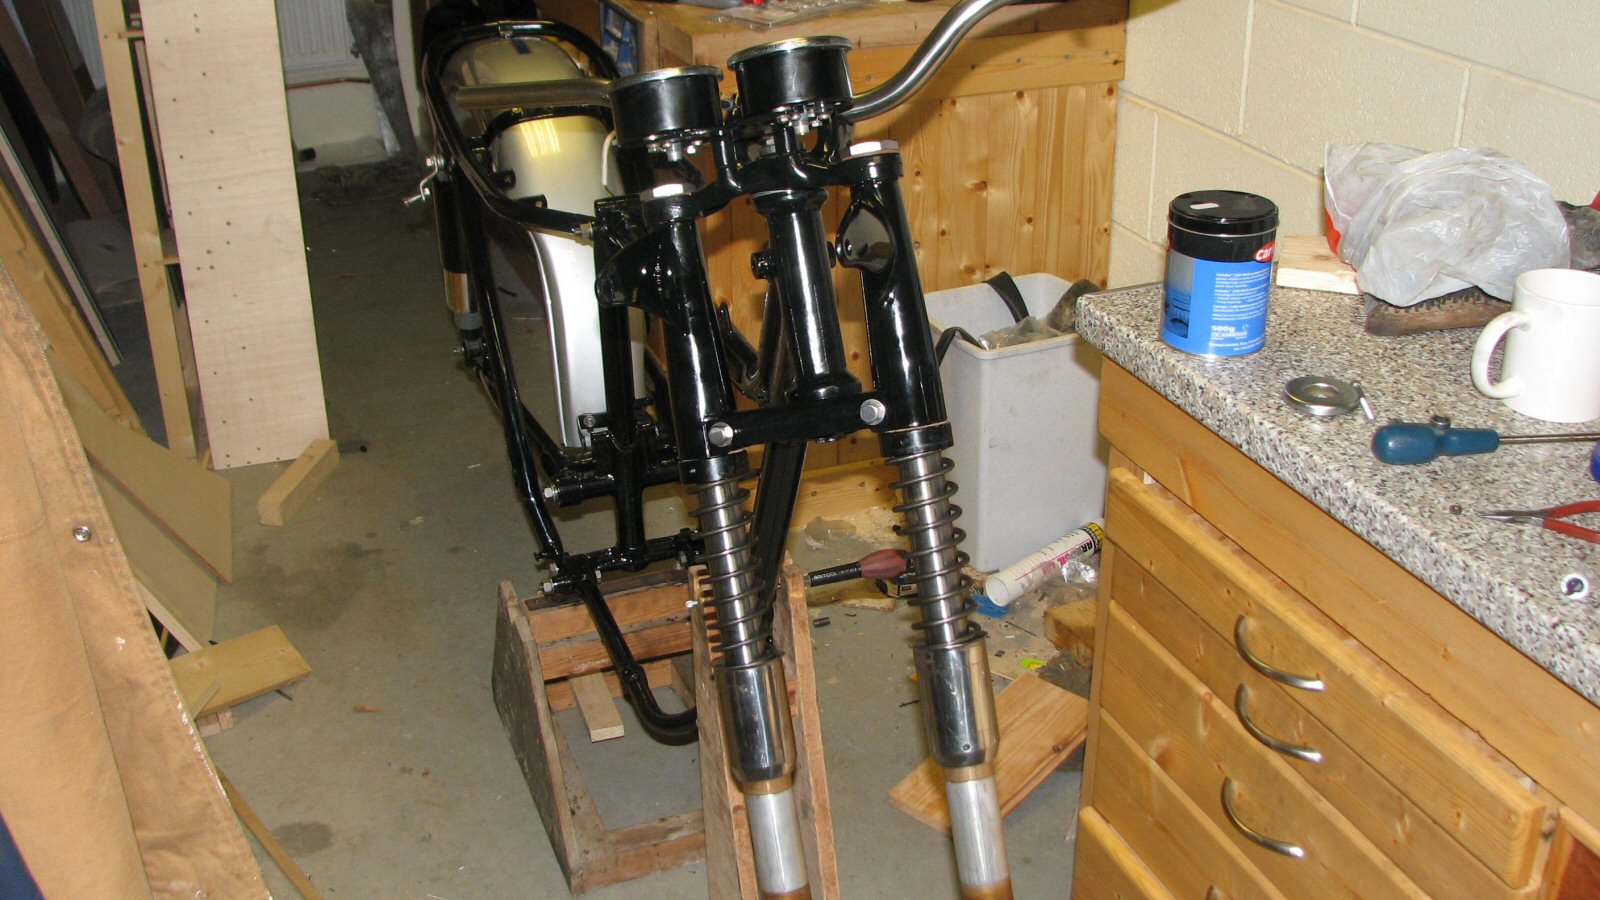 |
The lovely new paint job is apparent as the frame starts to take shape. The best thing about the Triple S paint job is that it's tough and survives the odd bang. I'm very impressed. |
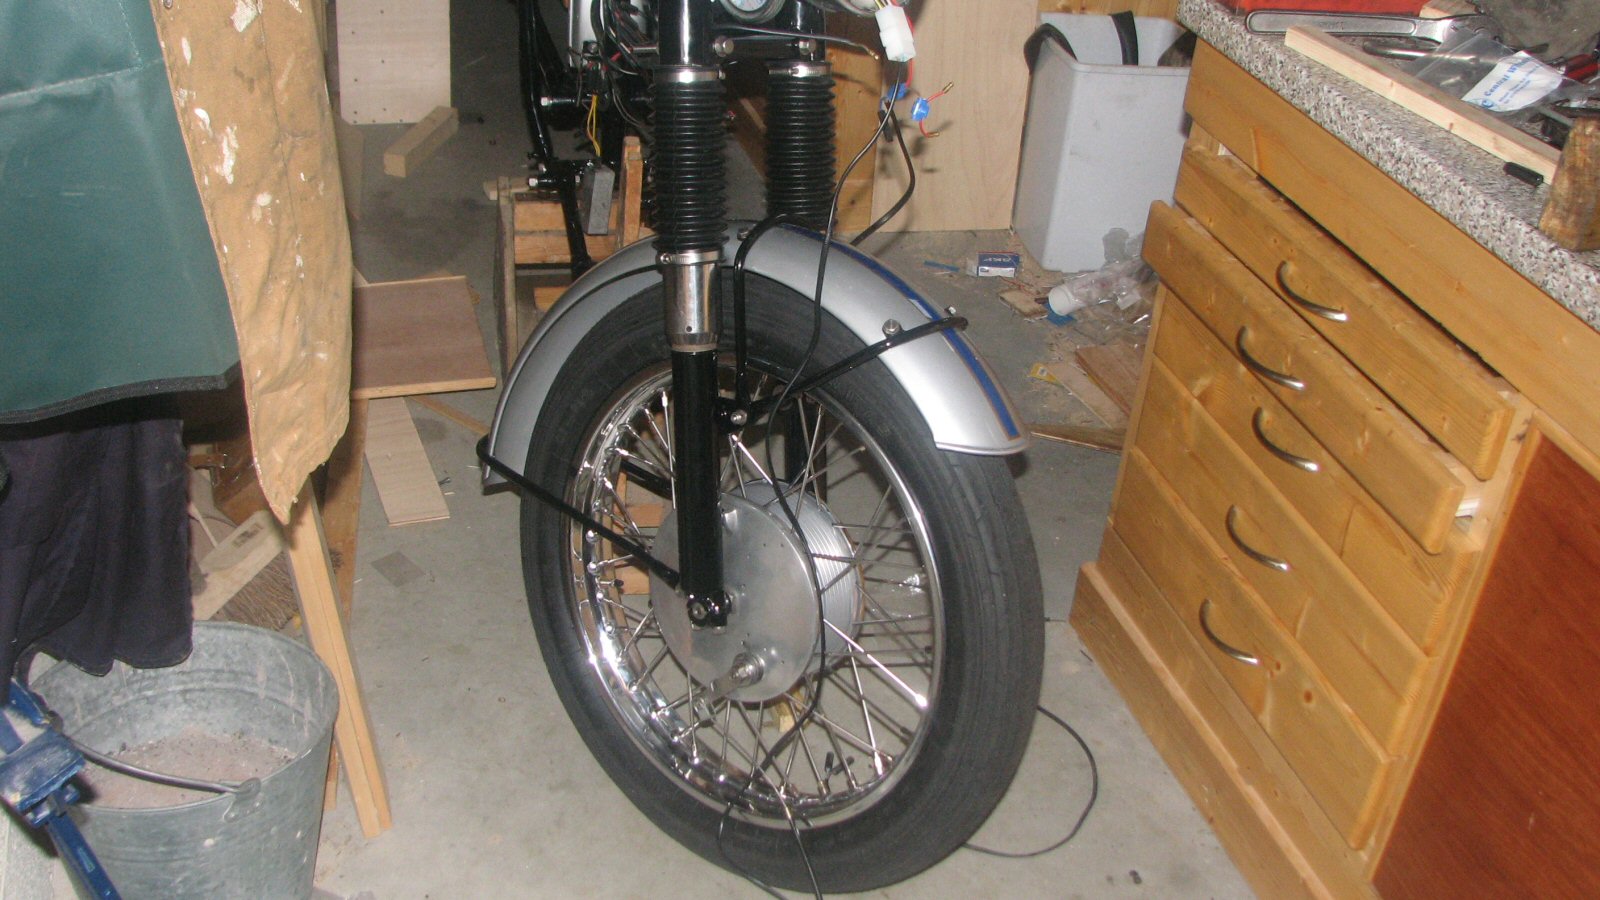 |
The wheels had suffered in a damp garage. The rust had even started to work its way through the wheel hub paint. The wheel went off to Central Wheels near Birmingham. I've had stainless steel rims fitted as the garage is too damp. |
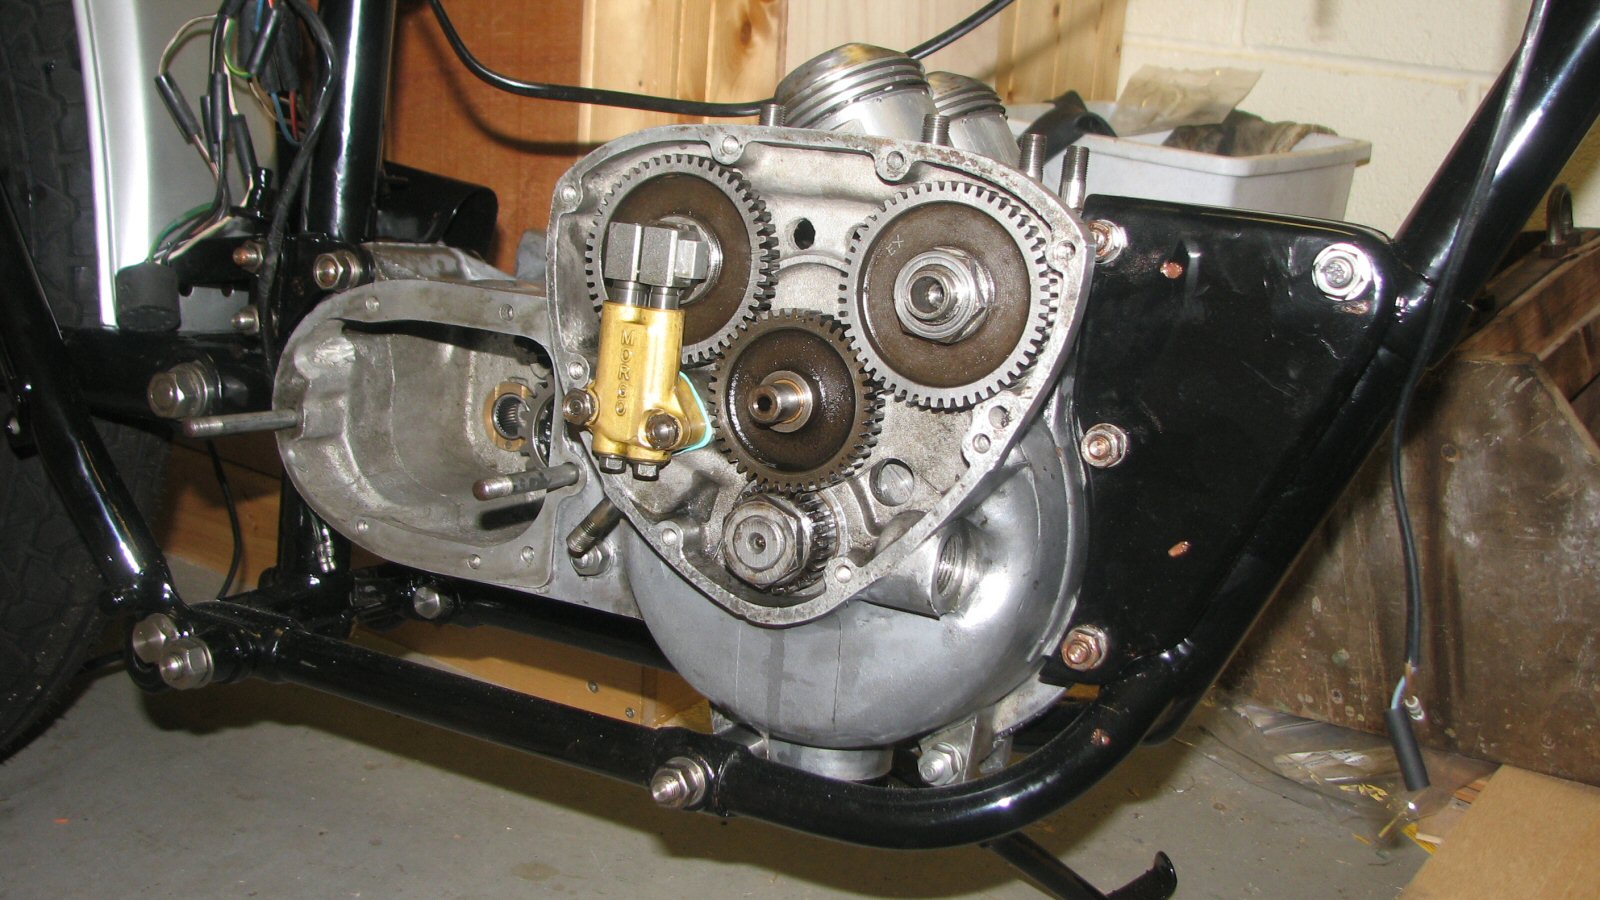 |
Timing side coming together. You can see that SRM have handily etched the cam wheels so I don't get them the wrong way round. I did find that they were a bit excessive on their use of Loctite. You can see that I follow recommended practice and use lots of copper grease on the stainless steel fastenings (now just got to get rid of the excess!) |
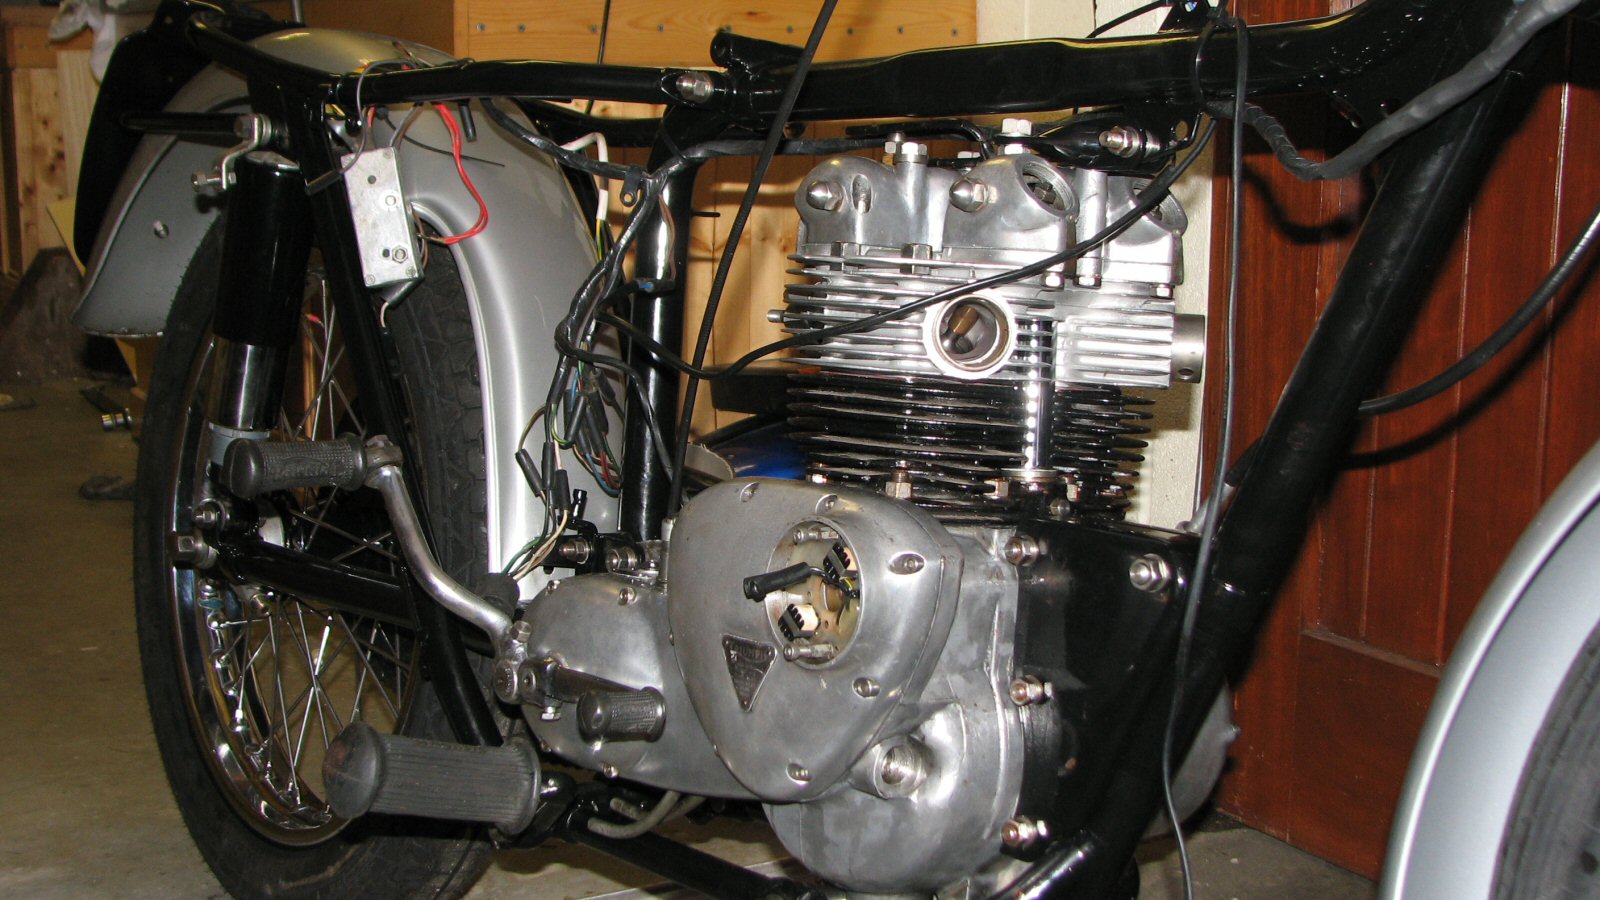 |
This is the refurbished head - I'll get a close up of the fin repair at the next opportunity. The rocker boxes looked in a dreadful state but the came up nicely with a small polishing wheel. |
 |
Silencers and exhaust pipes from Armour products - again in stainless to avoid corrosion problems. Why is it that modern chrome lasts nowhere near as well as chrome from the sixties? Both exhaust pipes were over length and had to be cut to size. The right hand one is particularly over size. I've noticed this on a number of pipes that I've bought so someone must have a wrong pattern. For the first time, the exhaust pipes have the intermediate bracket on the horizontal part of the pipe - where they should be. Every one before this has had the brackets on the vertical part of the pipe. Now I've just got to find (or make up) the right angle brackets that go to the frame. Looks like a bike with the pipes on, doesn't it? |
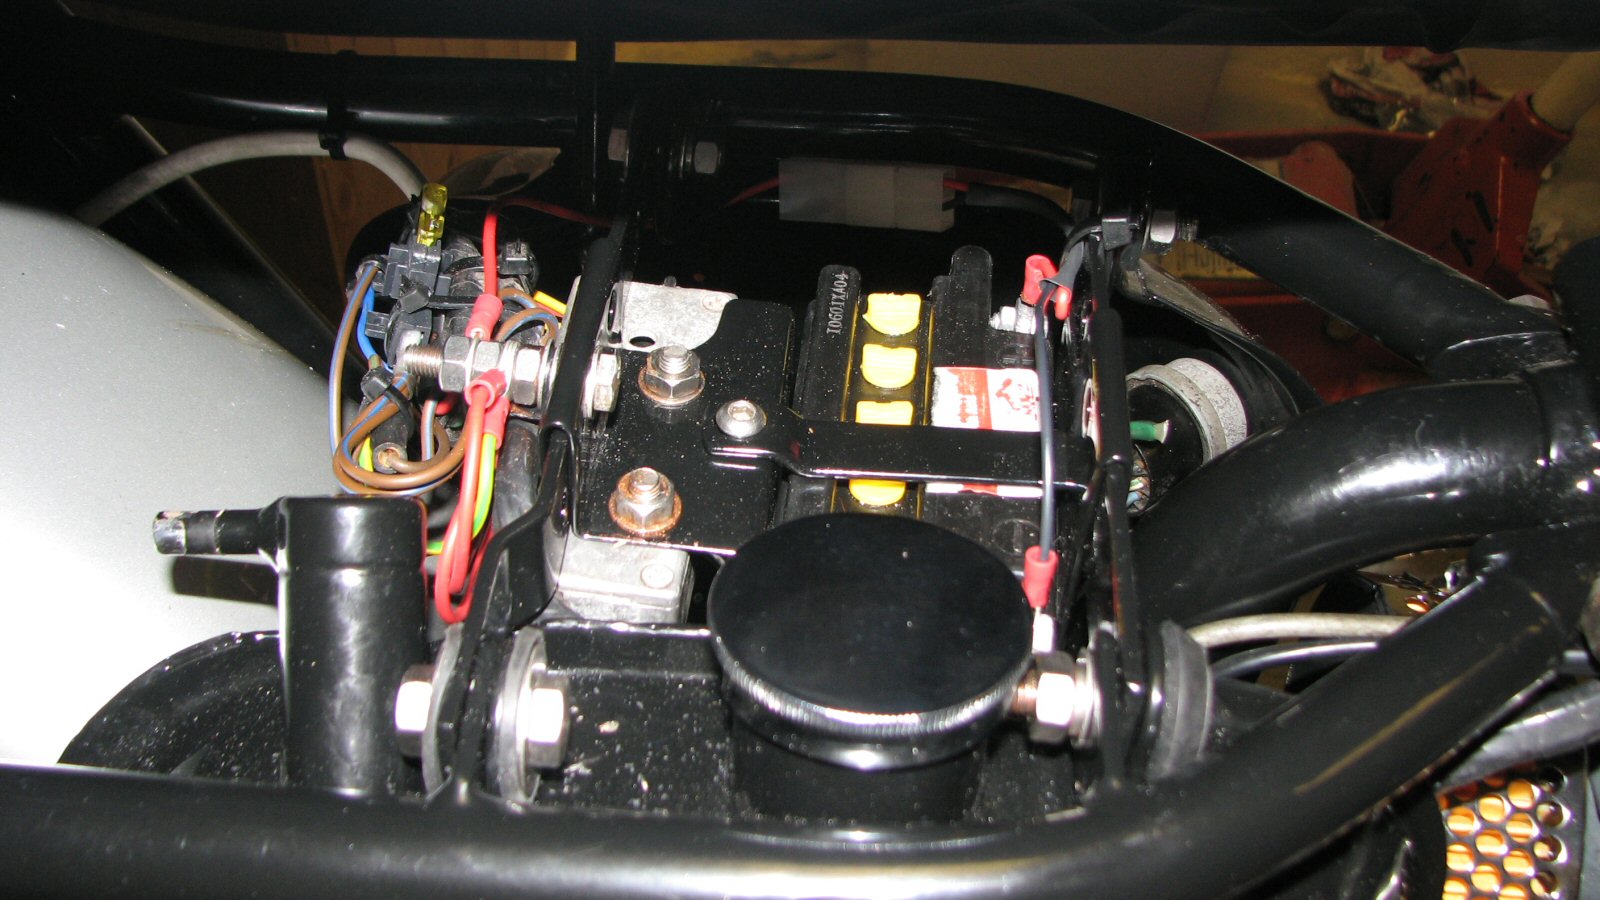 |
The 12V regulator is the alloy box immediately behind the battery. The white connector (below the far frame) allows the connection of a 12V trickle charger over the winter. One day I'd like to get someone to show me how all the bolts and rubber mountings are supposed to fit on the battery support/side panel/oil tank set up. I can't see how you're supposed to get 6 rubber mountings fitted in here. As supplied they're too thick so I had to cut them down to size. There's not a lot of room as the frame and the oil tank limit the size of bolt you can use. |
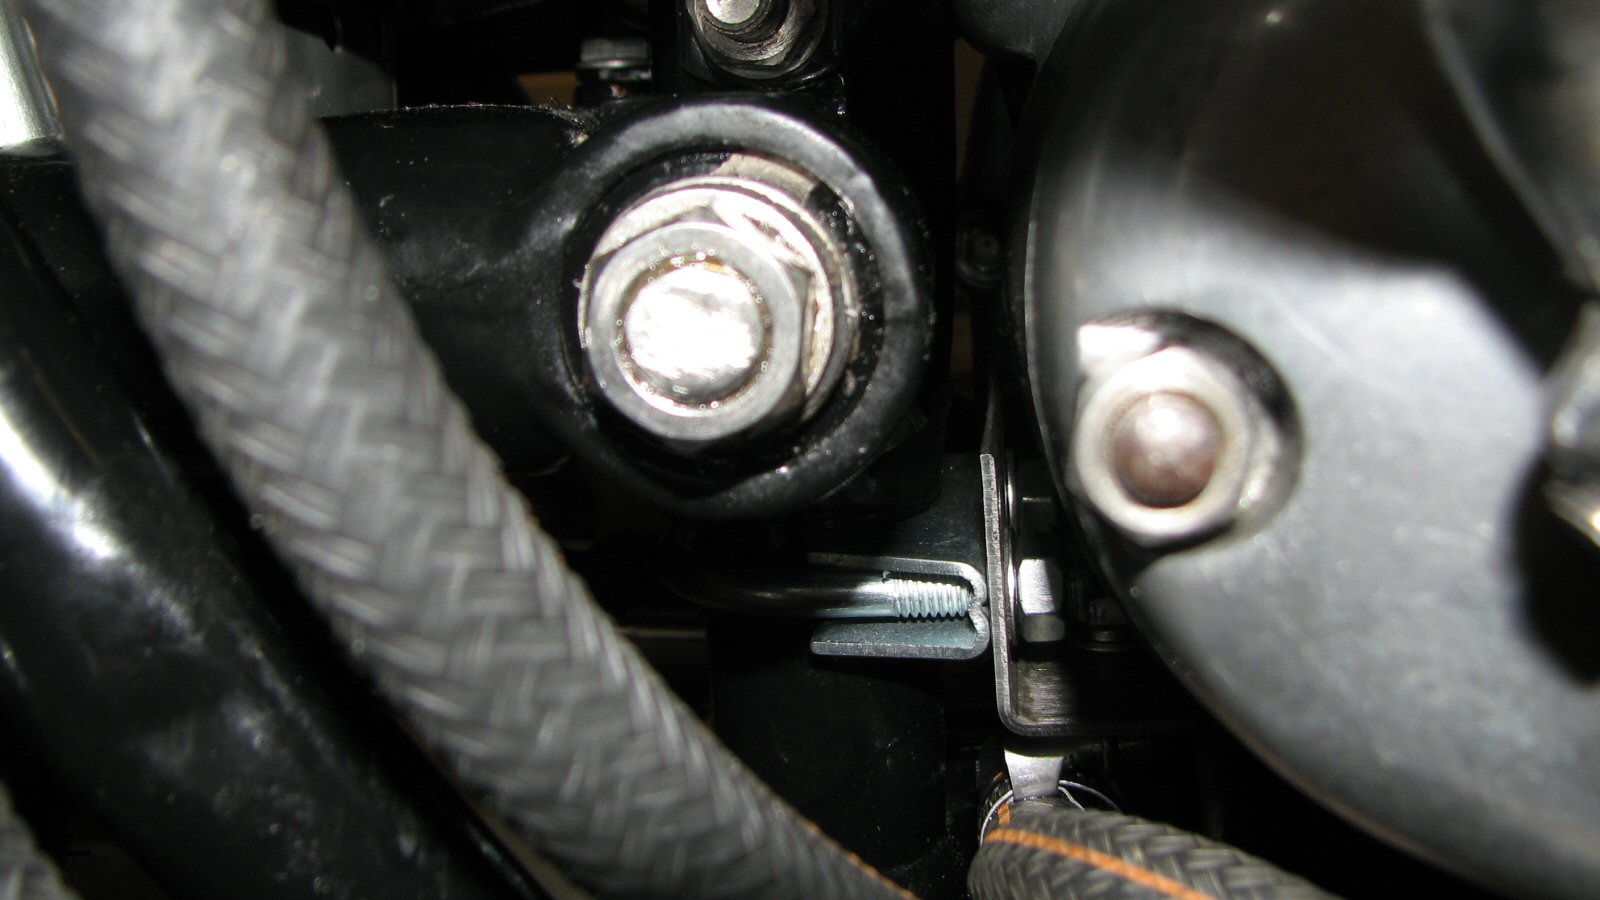 |
As I've had a few engine failures, I was interested in the oil filter kits that are available these days. Paul Goff makes a neat little kit so that the filter is tucked away above the frames. I had to modify the bracket by drilling a couple of extra holes. This allows the filter to sit a little higher so that the pipes clear the frame - they pass over it, not under it. You can just make out the original hole - the bracket clamps to the down tube, just below the swing arm casting. If you're wondering - the swinging arm spindle has been replaced by a kit from D & C Classics. Dave from D & C got fed up with replacing his swinging arm bushes after a few hard trips so he came up with this kit. Metalastic bushes are pressed into the swinging arm sockets. |
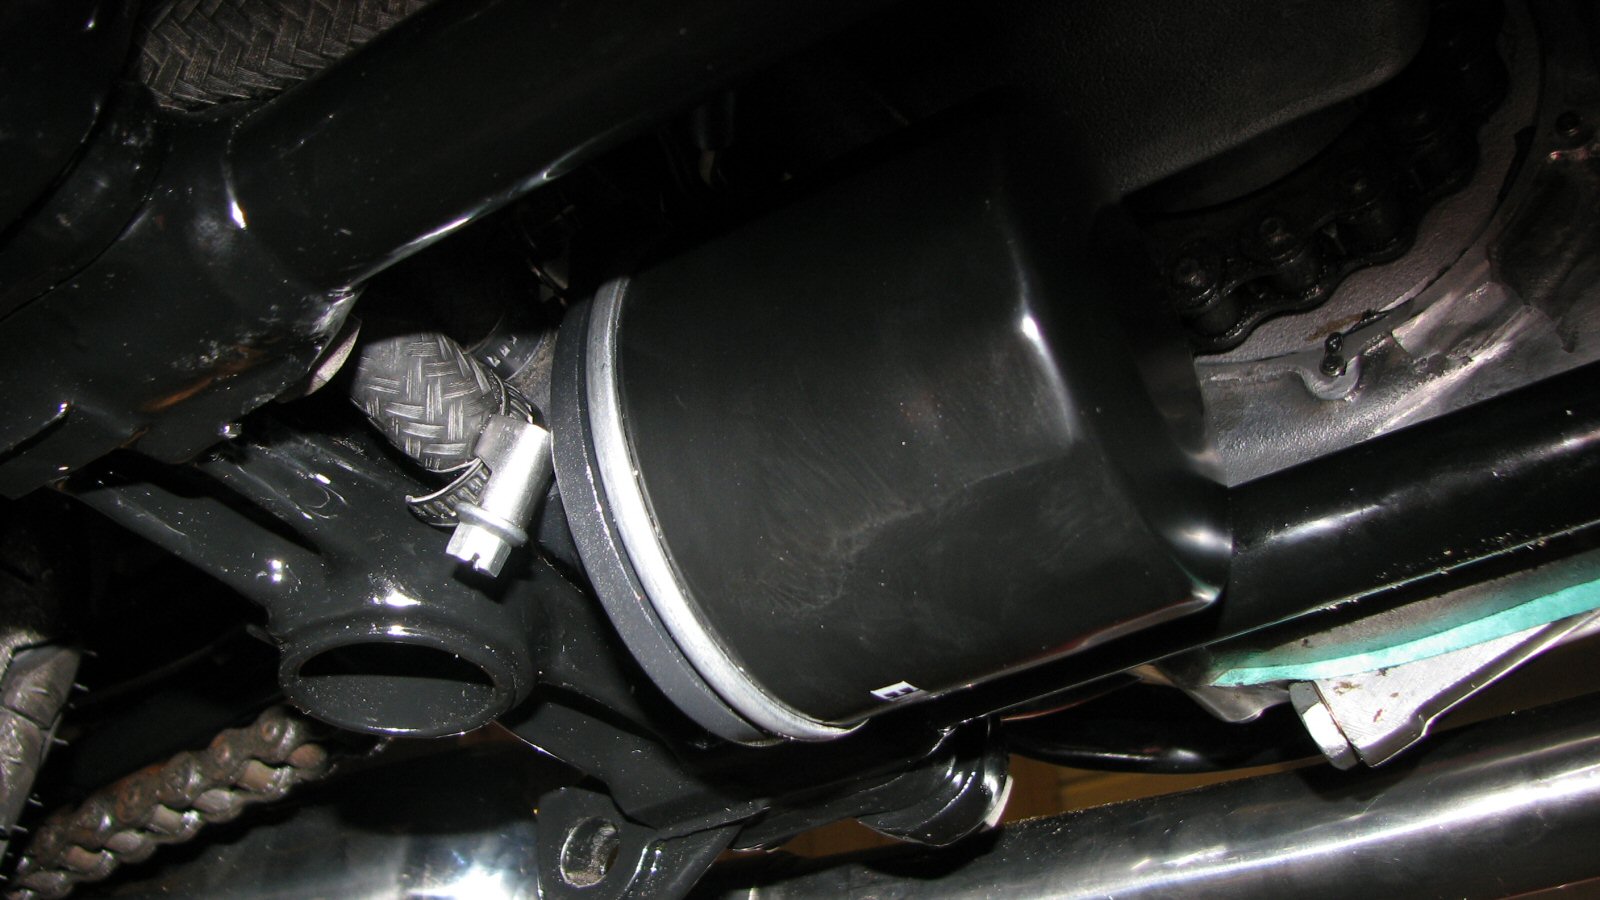 |
Here's a view of the filter tucked away at the back of the gearbox. It's out of the way of the gearbox drain plug so no worries there. In order to get the oil flowing I squirted oil down one of the pipes into the filter. I also pumped oil up the rocker feed. Can't have too much oil on starting for the first time - except perhaps in the cylinder head where it doesn't help the spark plugs. |
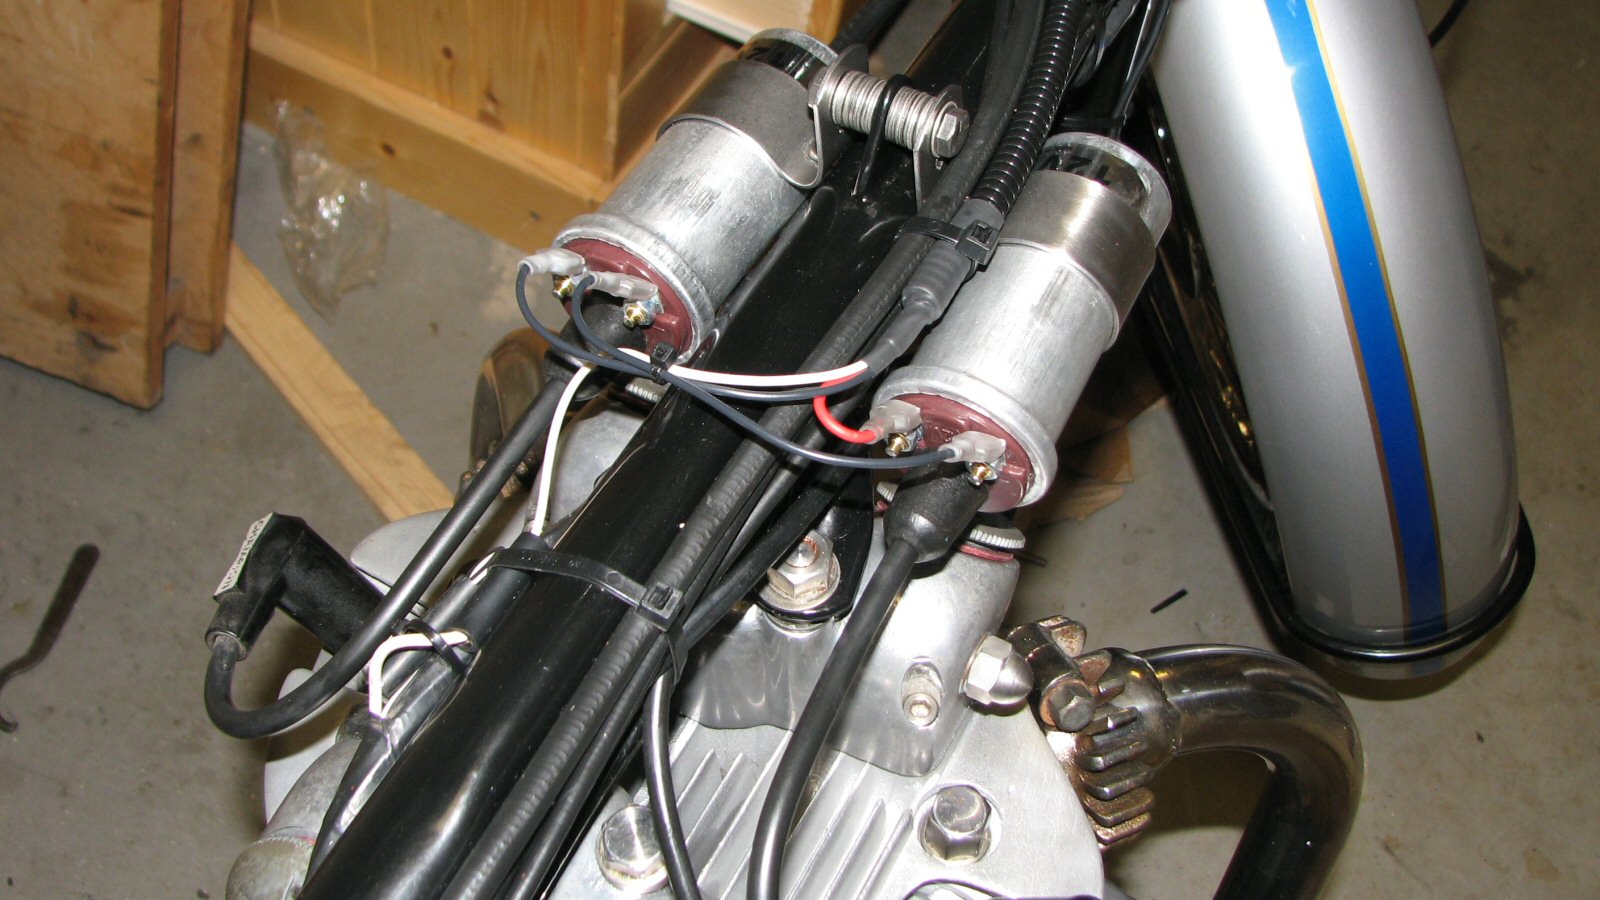 |
As you can see on page 3, to date the coils have sat underneath the tank. As I had used the 48mm diameter versions, they are a bit obtrusive. I was determined to fit the coils in the original fashion, especially as I now have a tank with recesses for the coils. I did get supplied with some brackets that had "C" style clamps and 45 degree brackets but I'm sure those are for a later model bike. I spotted someone selling stainless Tiger Cub coil brackets on e-bay. I had to open out one of the mounting holes into a slot but this is how I think they fit. The evidence is in Roy Bacon's book on Triumph Twin restoration where you can just make out the bottom of the coil bracket in a couple of the photos. There's no clear picture of the fitting in the book. I'm hoping to get some correct spacers made up rather than using lots of washers. |
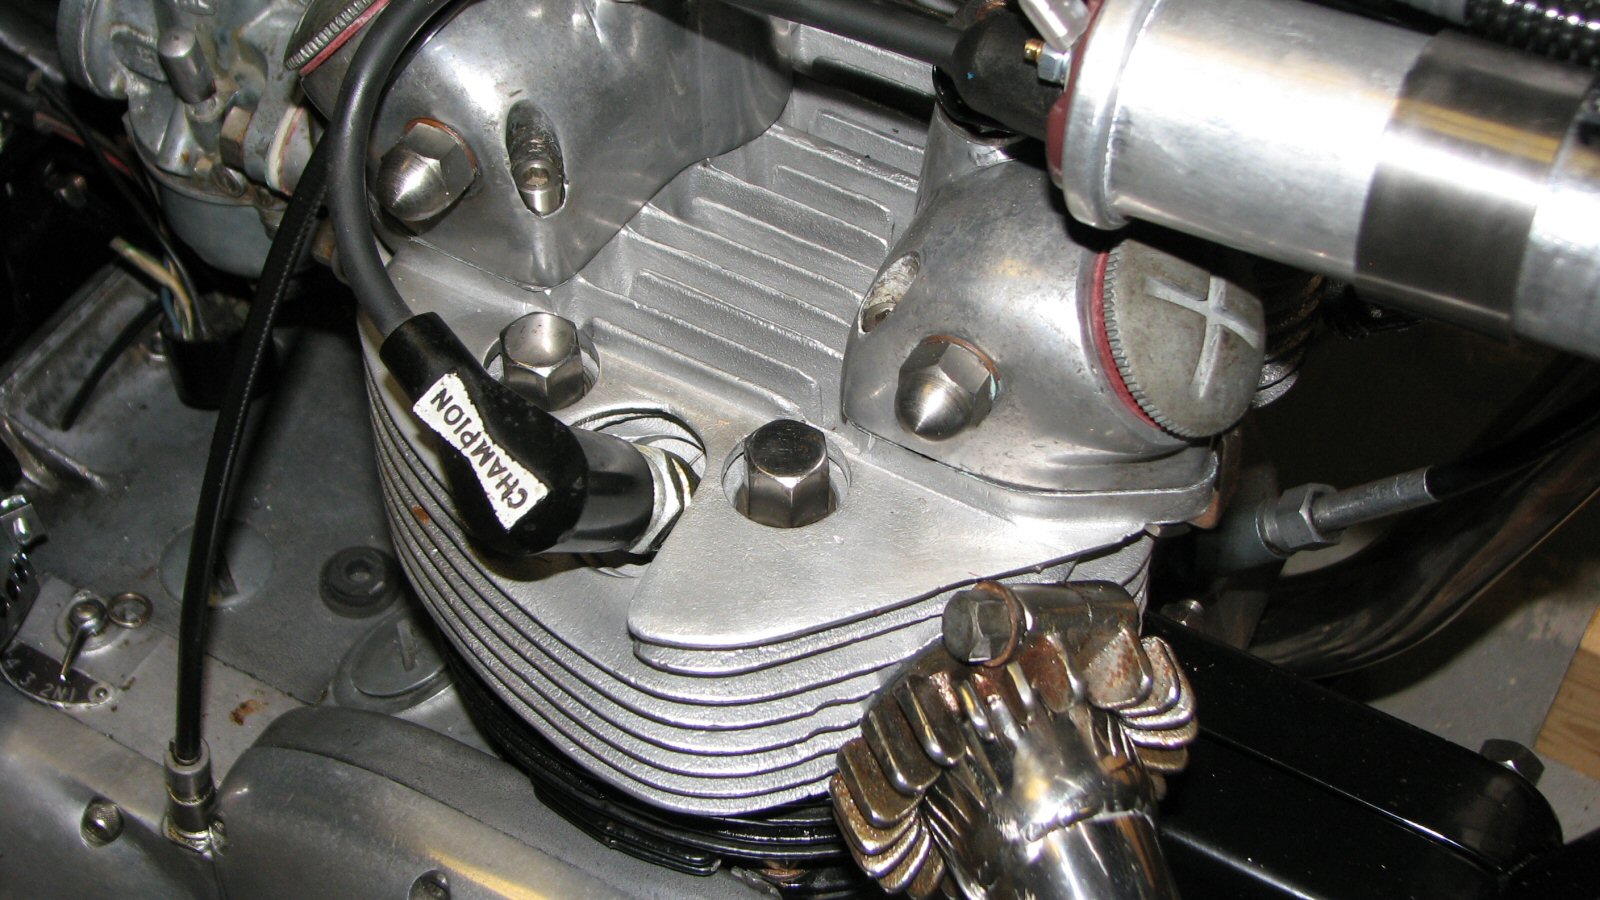 |
Here's the refurbished cylinder head - compare it with the picture on page 1. If you look very closely you can see a dimple in front of the head bolt - otherwise perfect! Valve clearances have still to be done. |
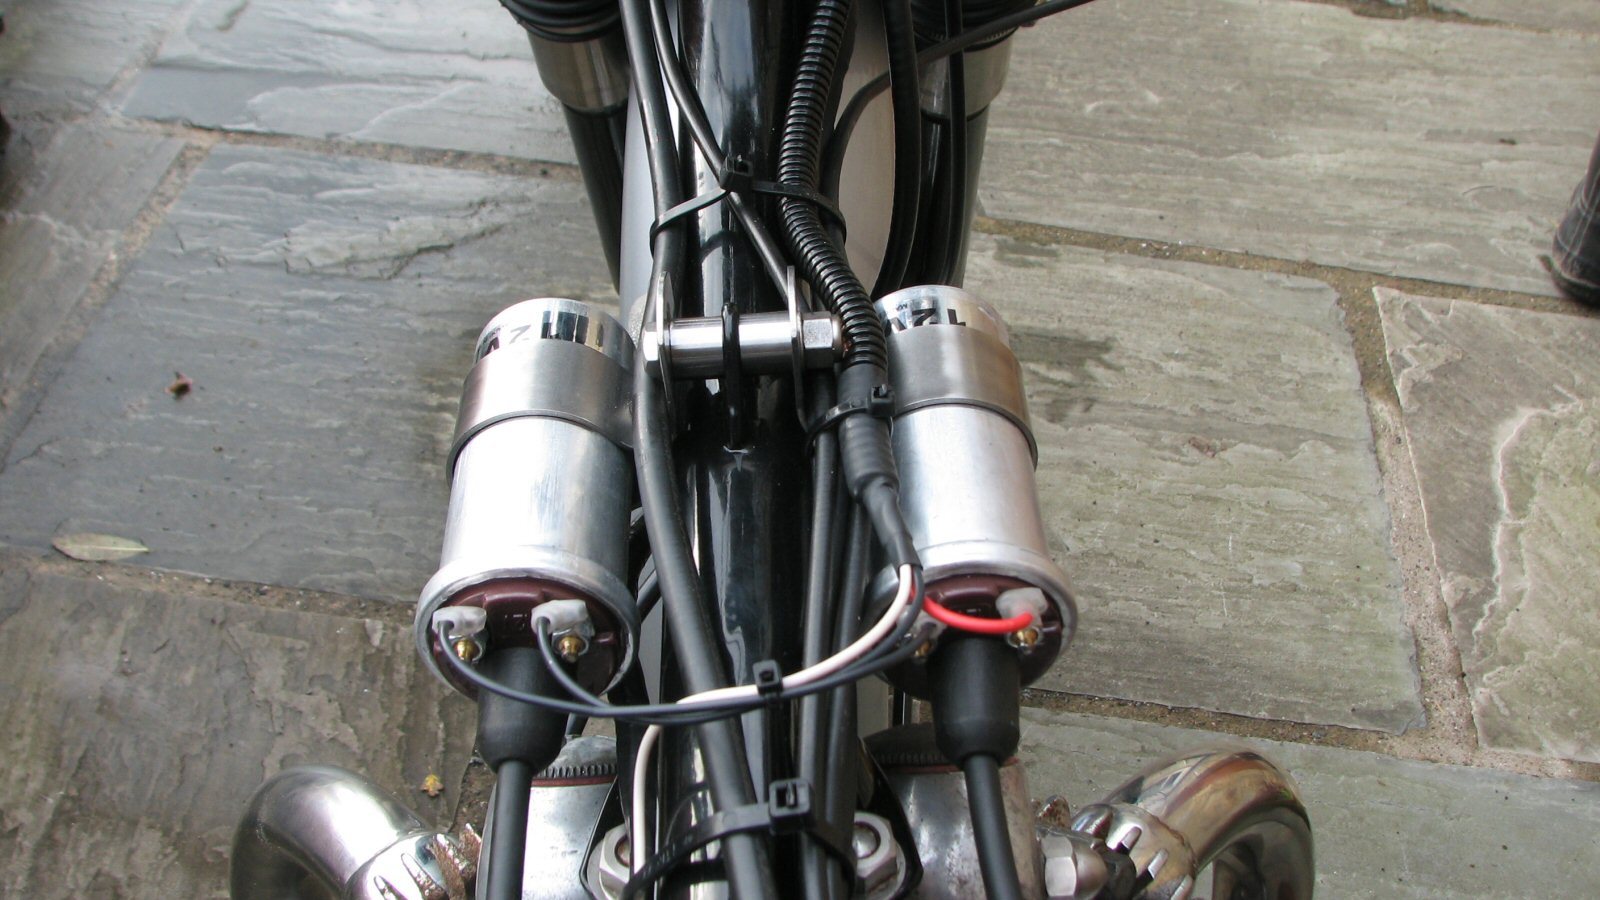 |
My brother in law has machined up some nice spacers so the coils can be permanently fitted. Having got the tank fitted now, I can see that I can move the coils forward which give the HT lead some more room. |
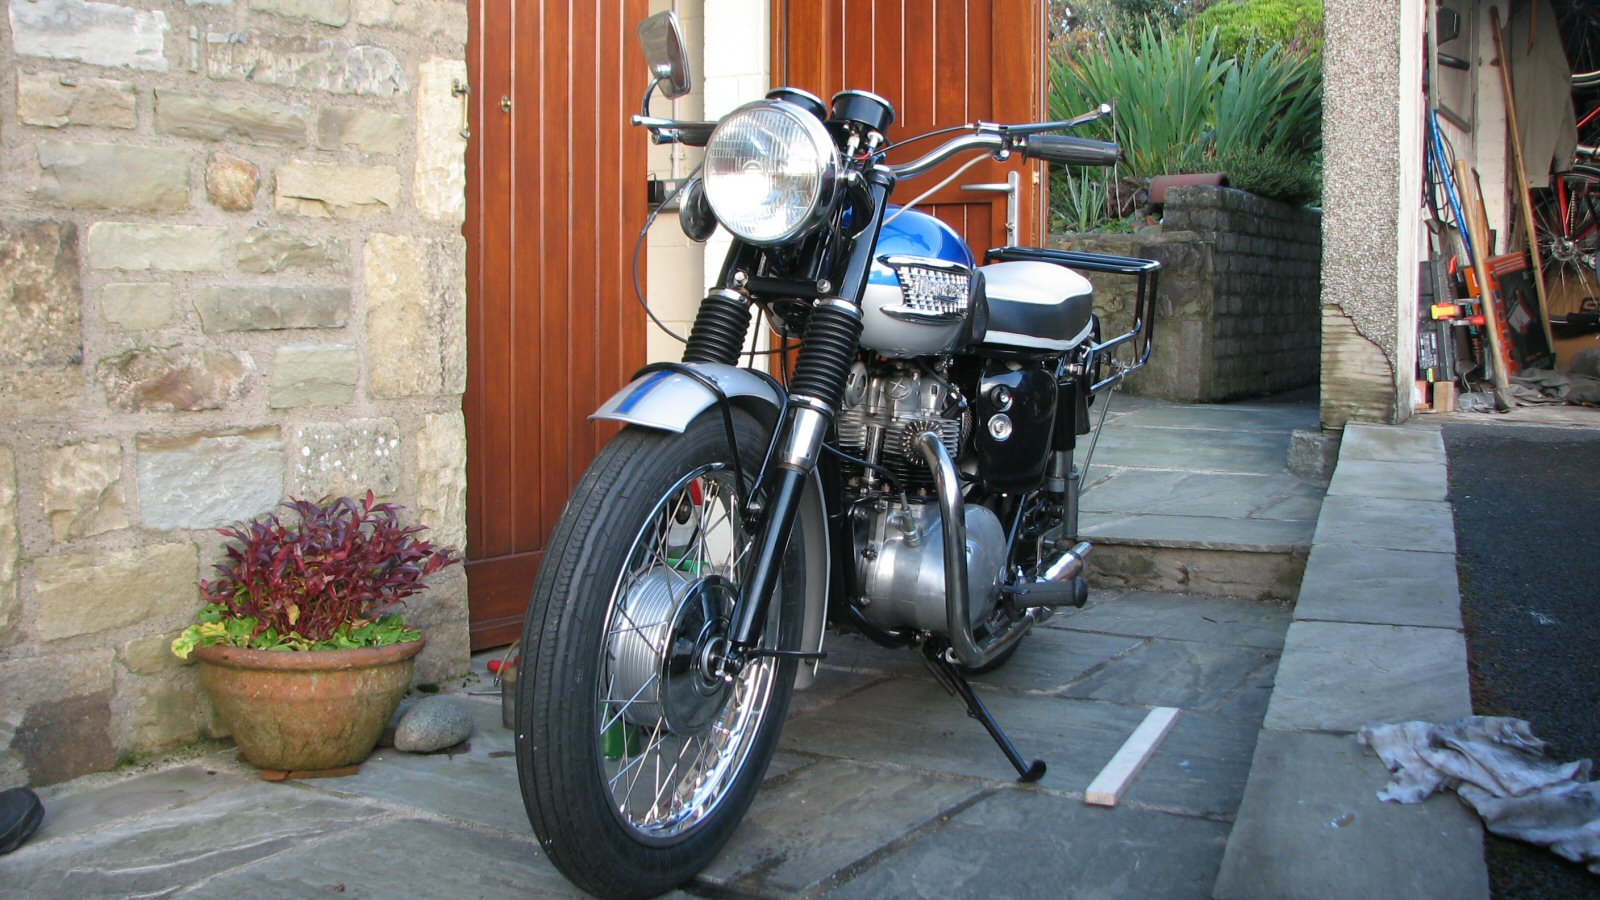 |
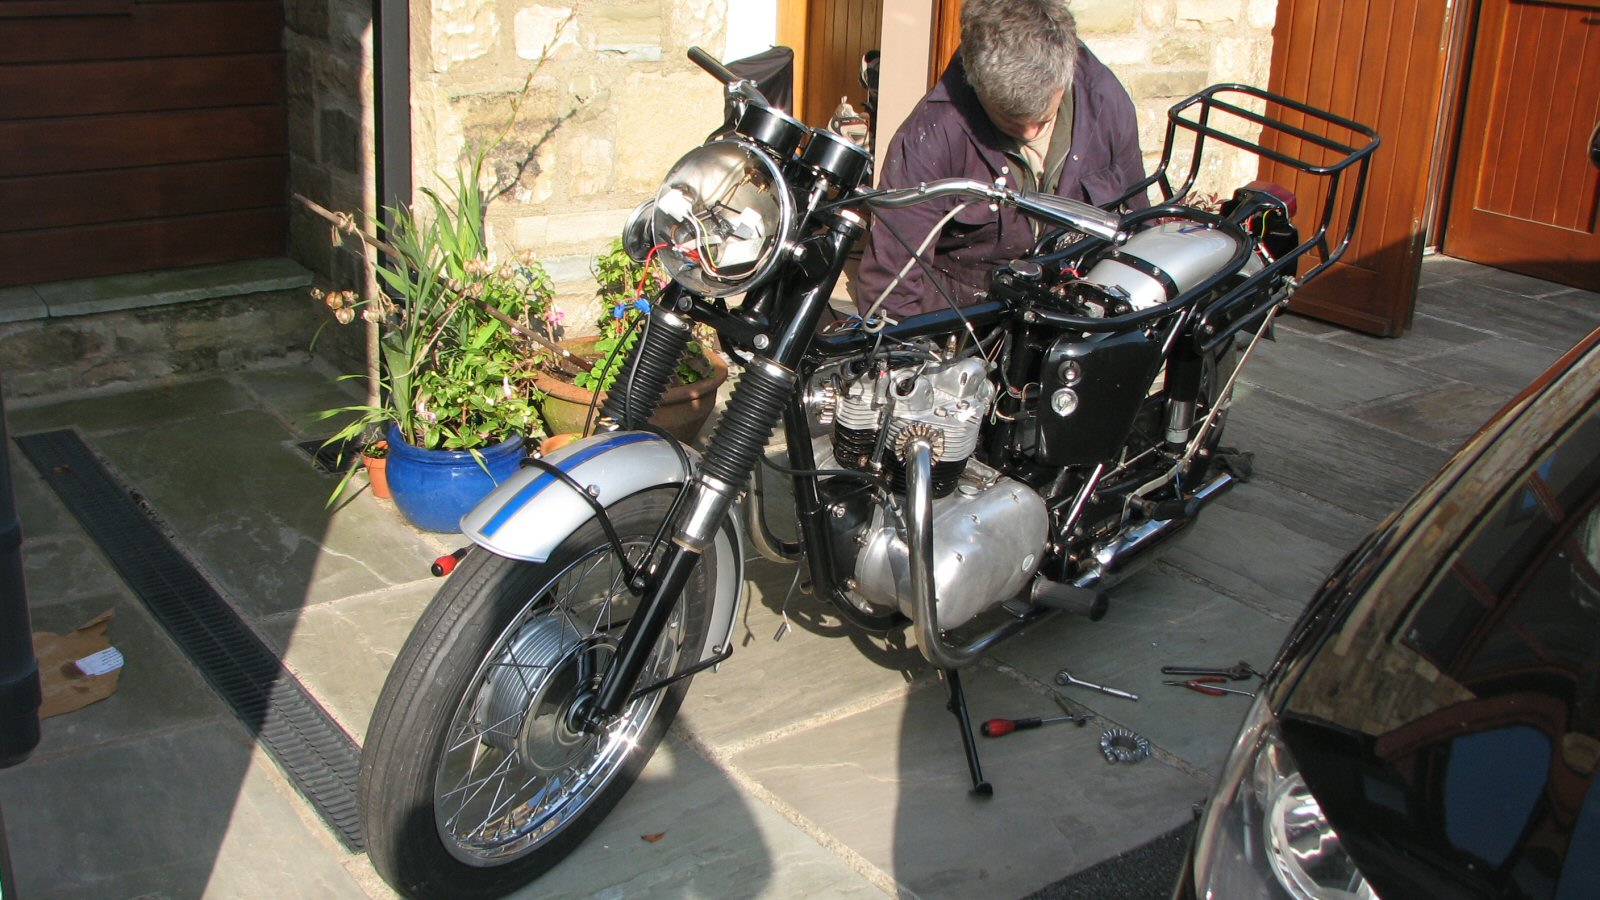
Ready for starting! The parcel grid is on back order and I need the trim strips. Apart form that, everything is pretty good. You can follow this link if you want to see it starting. The bike started fairly easily but it doesn't want to tick over. After a short time of running, there was a noise from the valve gear that I wasnt very happy with. It does look as if the left exhaust pushrod hasn't located properly so the tank will have to come off again. I need to fit the plastic cover over the ignition switch. This is always a bit of wrestling job. |
 |
Here's the offending pushrod. I must have managed to have not located the top in the ball joint as you can see a little nick in the top. Best to have a new one. |
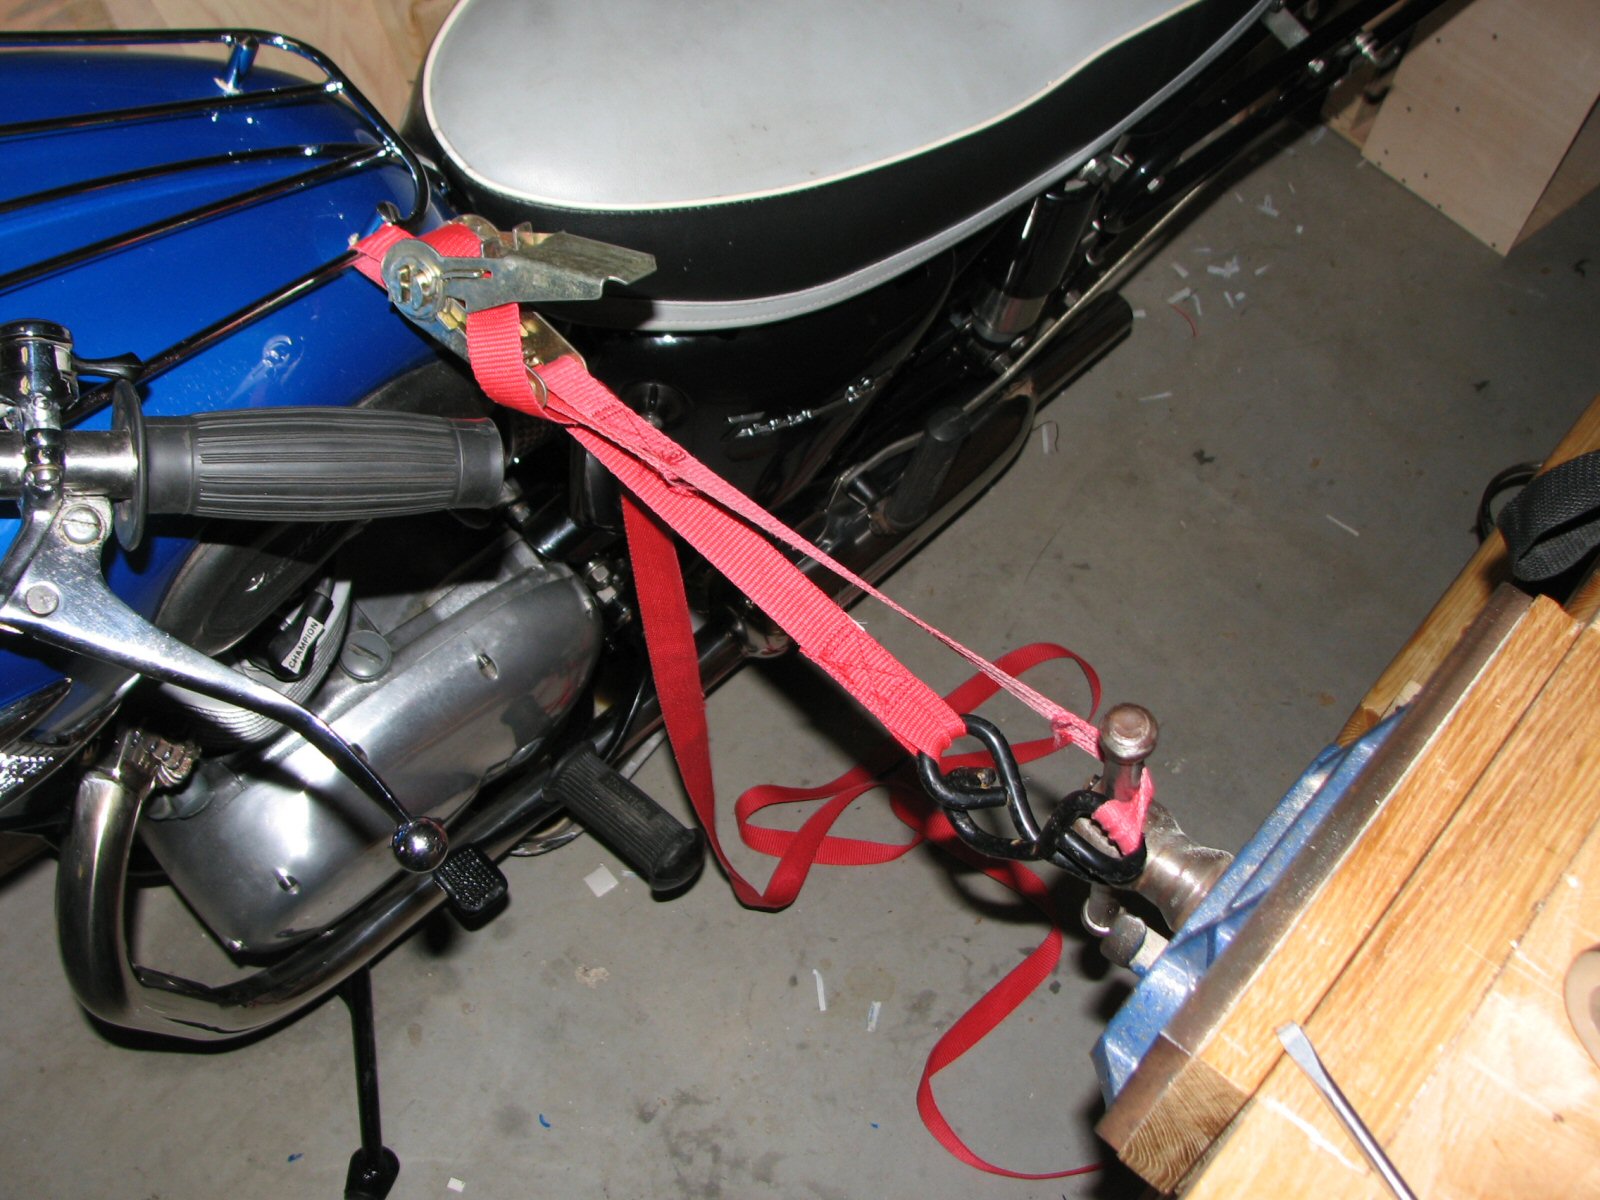 |
At the end of November 2010, I replaced the damaged pushrod and got the bike going. Unfortunately this coincided with the earliest dump of snow for some year so I was constrained to short bursts up the drive. Here's a link to a video of the start up. I think I need to do some tuning as I don't think the ignition timing is spot on. That will need some runs up the hill. As you can see in the video, the petrol tank still needed the parcel grid and finishing strips - both corroded from being exposed to stone dust for too long. I ordered a new parcel grid from Tri-Supply - Oliver Barnes warned me that I would need to fit it to the tank and he wasn't wrong. Here's the solution I came up with - these tie down straps come in very useful for the odd job. They really helped to fit a MGB windscreen which is another cursed job. The only criticism I have of Allan Lewis' paint job is that the paint is very prone to cracking - not at all like the powder coating on the frame. Fortunately, I had some touch up paint which has repaired the damage. Now all I need is the tank finishing strips and a fine day to get some final pictures! |
 |
I got the bike started in December 2010 but then winter intervened. At the end of March 2011 it was off for an MOT which it passed with no problem. I still need to get the tank trim strips. It's great fun to ride and it does appear as if I haven't got any engine leaks. I have got a leak from one of the forks - this has always been there. I have tried to tackle it with new washers but I will have to have another go. I've lost one rocker box cap already so I'm getting a set from D & C Classics that I should be able to tighten properly |
 |
Here's a view from the other side. I've still got to try and wrestle the ignition key cover into place. |
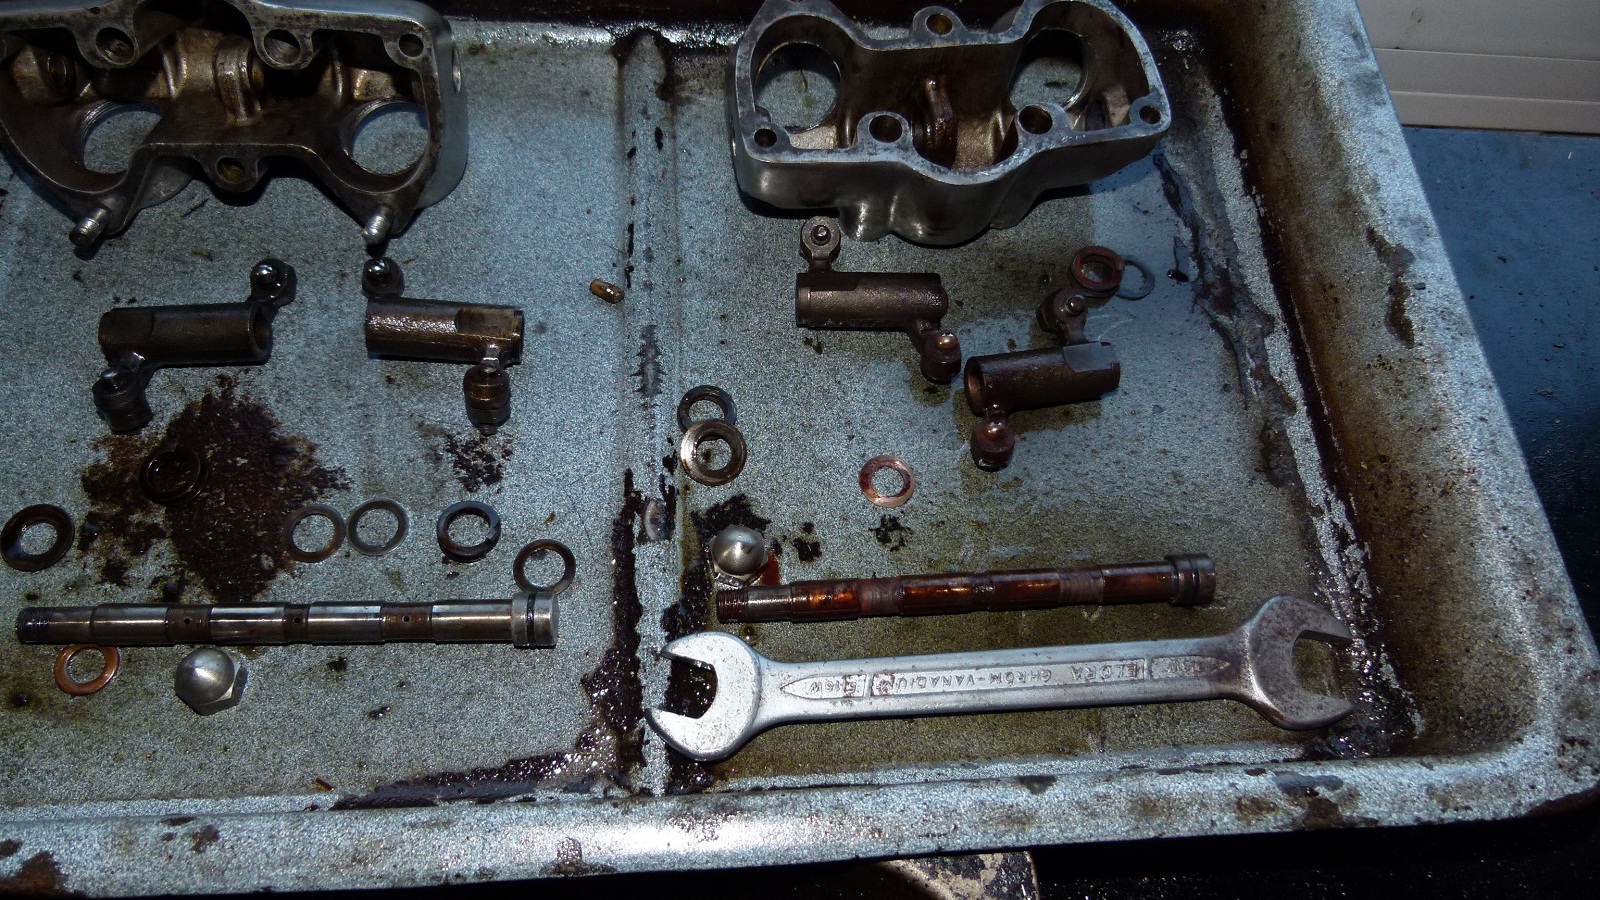 |
A couple of months later and I kept wondering about the lack of engine leaks. I did have one on the top of the chaincase join when I got above 50mph. That was due to a trapped gasket. When I got above 50, the pressure must have been enough to get past the gasket. I grew steadily suspicious about the noise from the rocker gear - to the point I was convinced that something was wrong. A top end strip clearly showed that oil wasn't getting to the top end- especially the exhaust rocker. A wire down the delivery oil pipe clearly showed a blockage. Eventually I worked out what it was. When the oil tank had been painted, 2 rubber bungs had been fitted over the oil pipes - including the rocker delivery. What I hadn't spotted was that a very small piece of masking tape had been stuck around the pipe and that had wedged in the rubber connecting pipe. You can see it in the centre of the picture, just to the left of the ridge in the tray. |
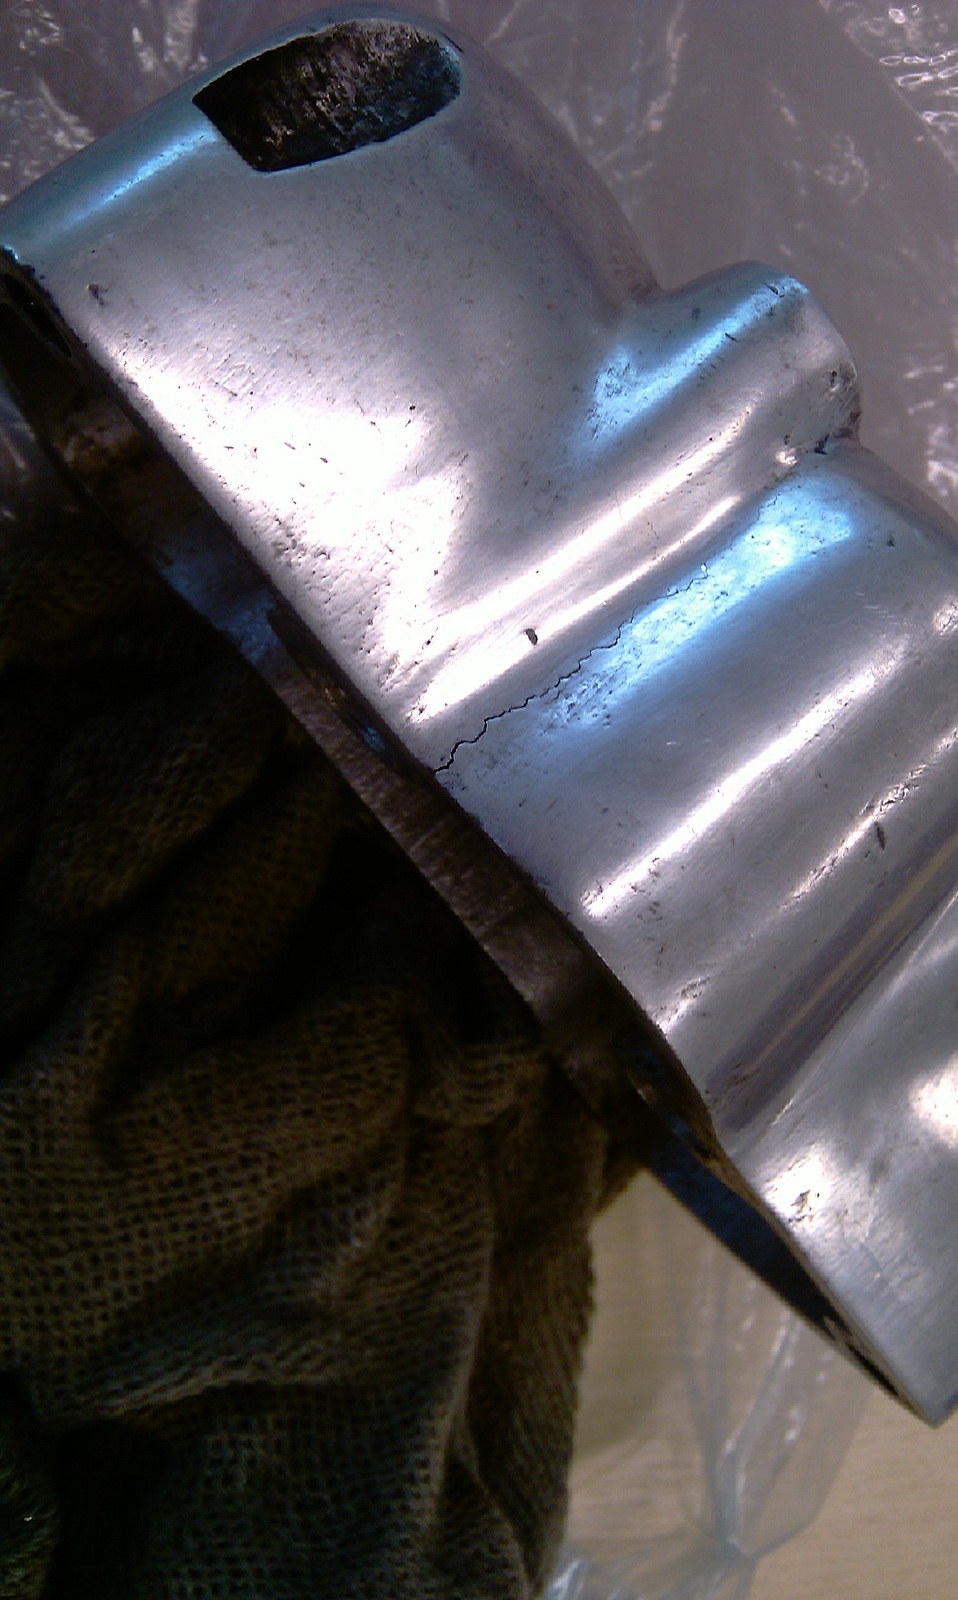 |
The exhaust rocker spindle and rockers had to be replaced as it was clear that they had overheated. Once the top end was reassembled, everything sounded much nicer. The problem now was that I had a major oil leak. The oil was appearing below the third fin from the top and then dripping down onto the crankcase. I decided that I had better attempt to check the facing of the rocker box covers. I got a thick piece of glass and some find grinding paste - the inlet cover came up nicely. I was about to start the exhaust cover when I just happened to notice the crack in the rear of the cover that you can see in the photo. I wasn't sure how I was going to get this fixed. I contemplated alloy welding. However, after putting the part number into Google, I found that www.britishonly.com in the USA had some new old stock. It took several weeks to get through Customs but it was worth it in the end. |